


This tutorial explains how to add student data to the AIO Class application.
There are two ways to add student data:
- Manually (one by one), which we will do via the mobile application.
- Using the Excel file import method via the web application at app.aioclass.com.
Adding Student Data One by One
- Log in to the AIO Class mobile application using your teacher account, then go to the Student menu
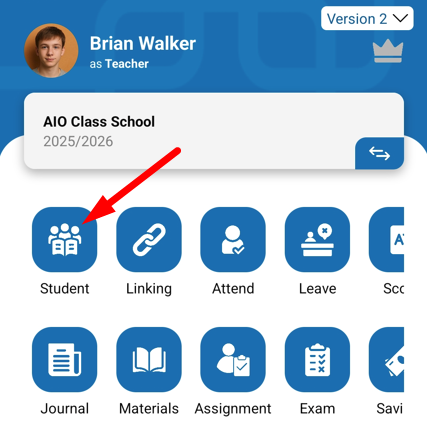
- Click the (+) button.
- A page will appear to fill in the student data you want to add.
- In Select Class, choose the class to which you want to add students (the class must already be added under the Setting menu). For example, select I.A
- Then complete the student data:
- In Name, type the student’s name
- In ID, type the student’s ID
- In Gender, type the student’s gender
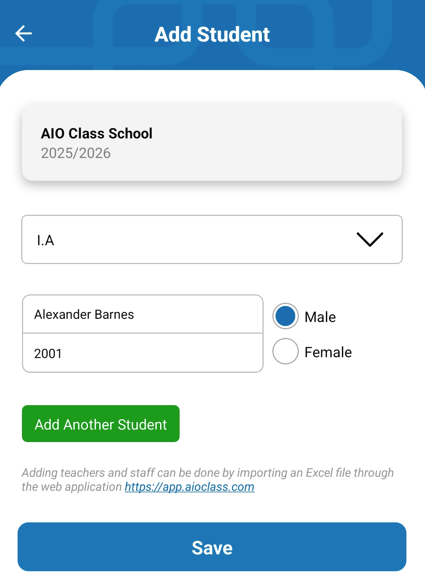
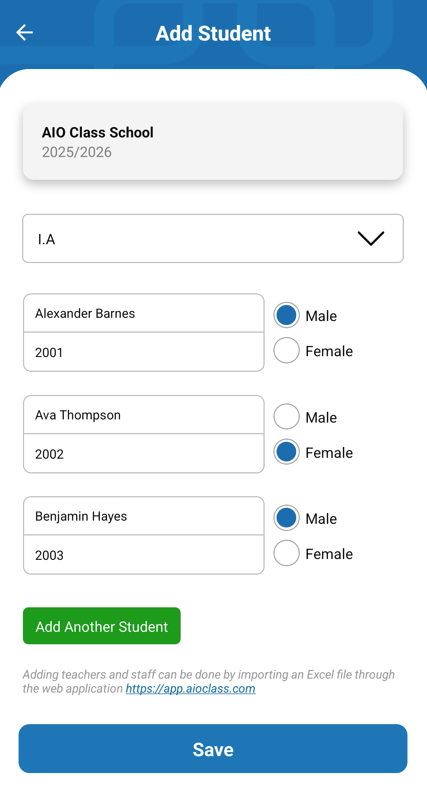
- You can add other student names by clicking Add Another Student
- When you're done adding student data, click Save
- If successful, the student data you entered will appear.
- You will see the Unlink Student and Unlink Parent buttons. These buttons will be used to disconnect student and parent links. They will turn blue if the account is already linked to a student or parent.
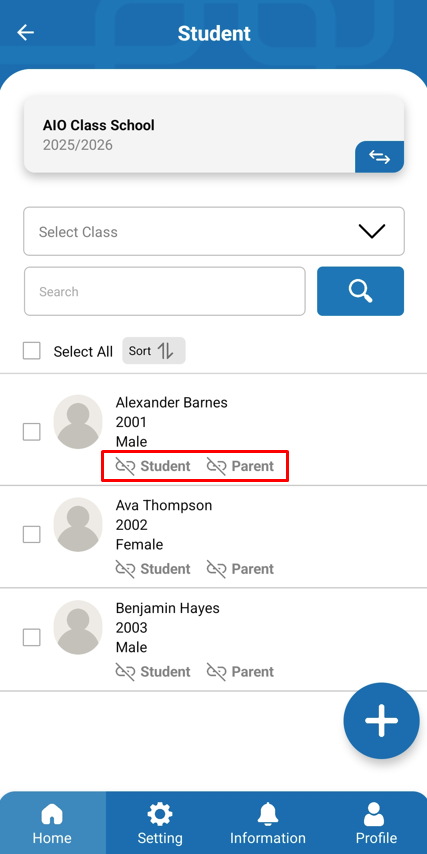
- The linking process will be explained in another tutorial.
Adding Student Data by Importing an Excel File
- Open the link app.aioclass.com in your browser (e.g., Google Chrome)
- Log in using the Google account you use for the mobile application

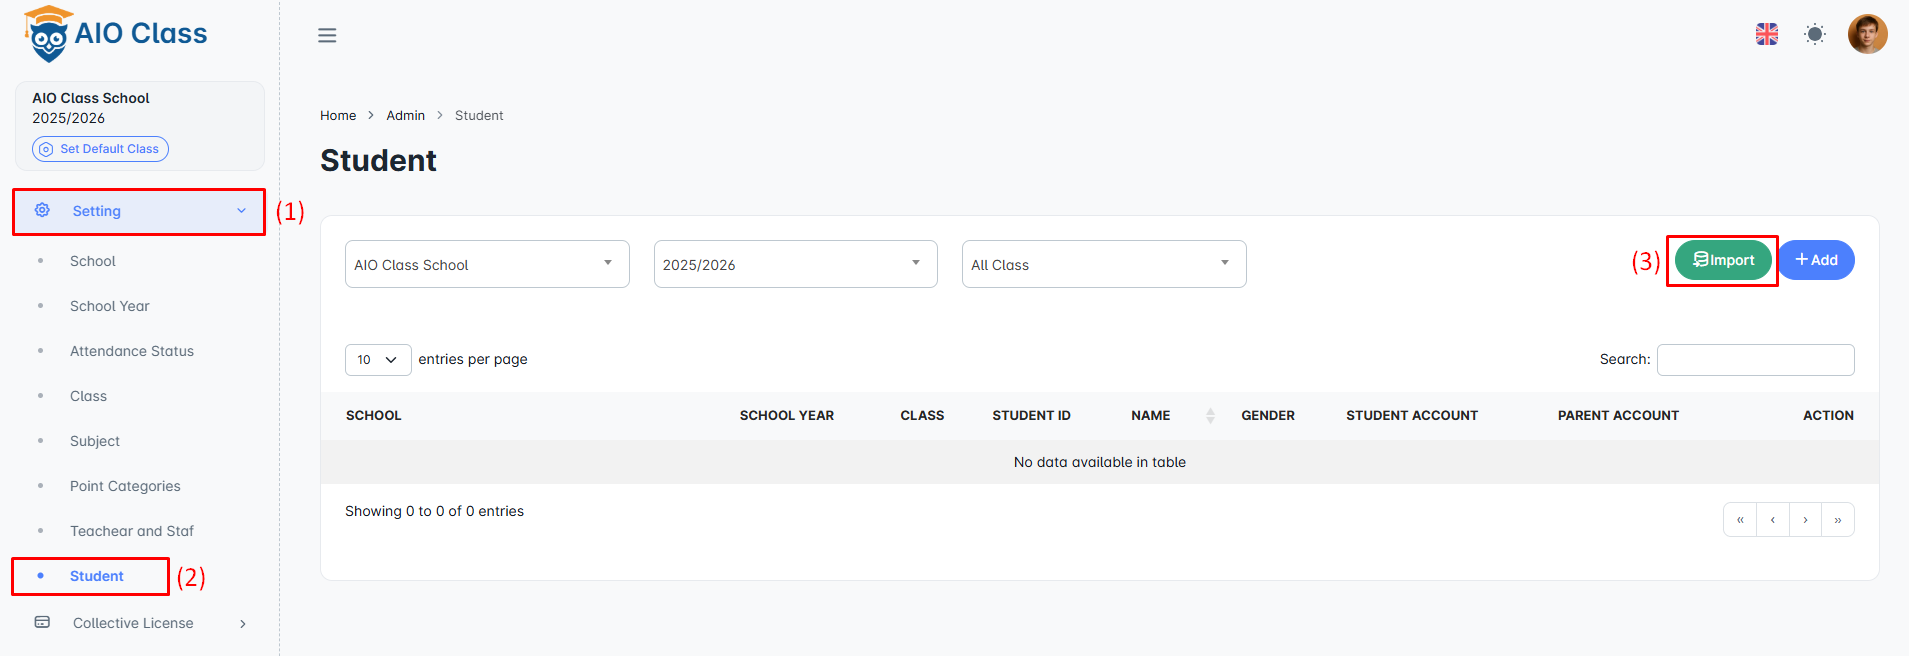
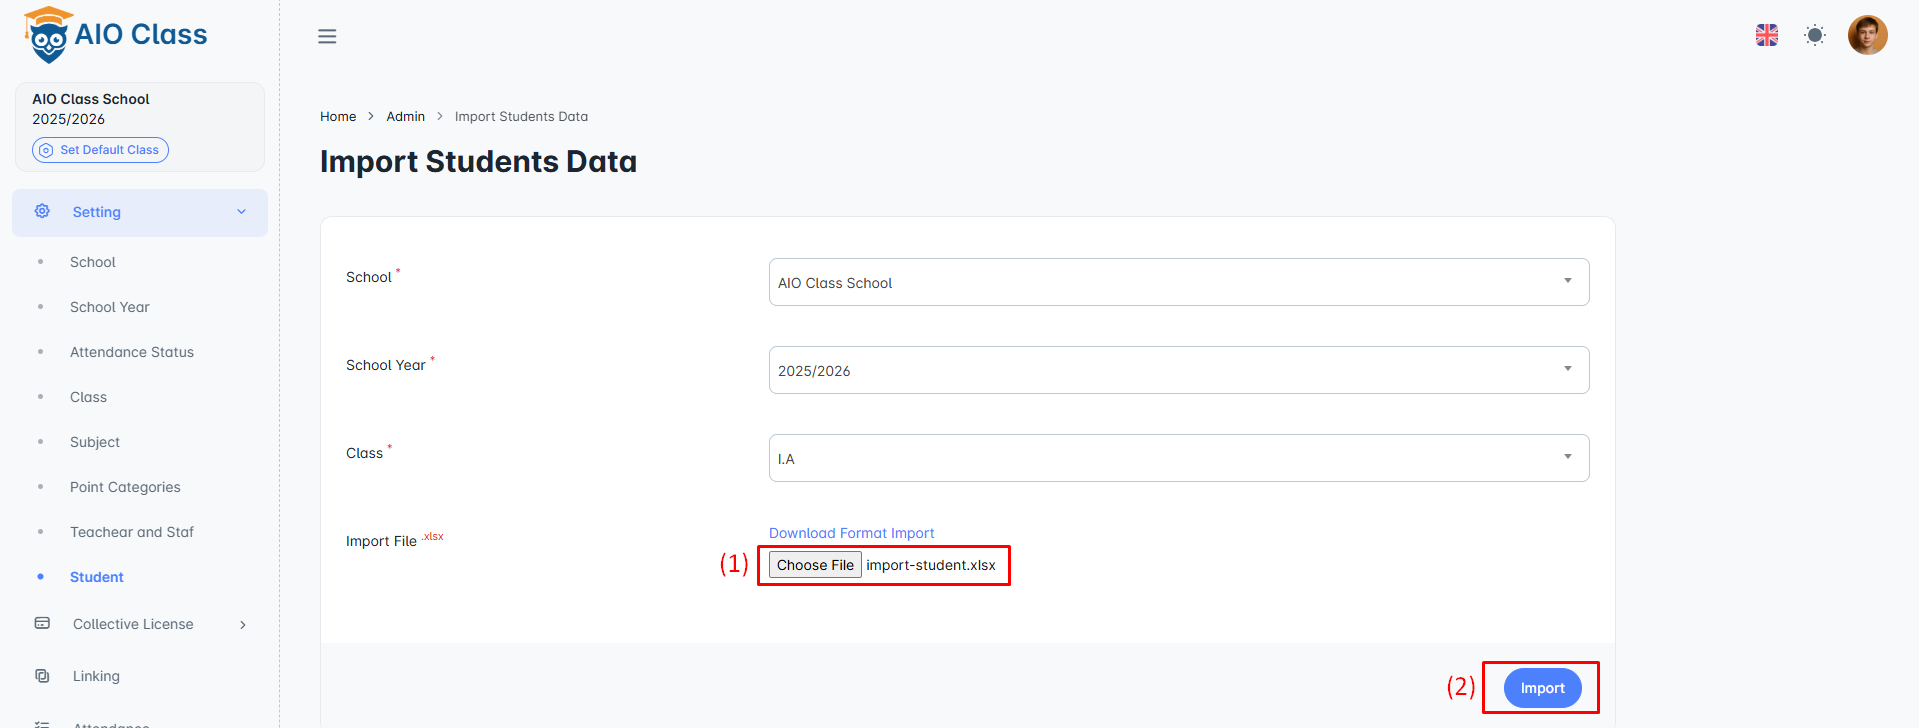
- Go to Setting > Student
- Click Import
- Then fill in the requested data:
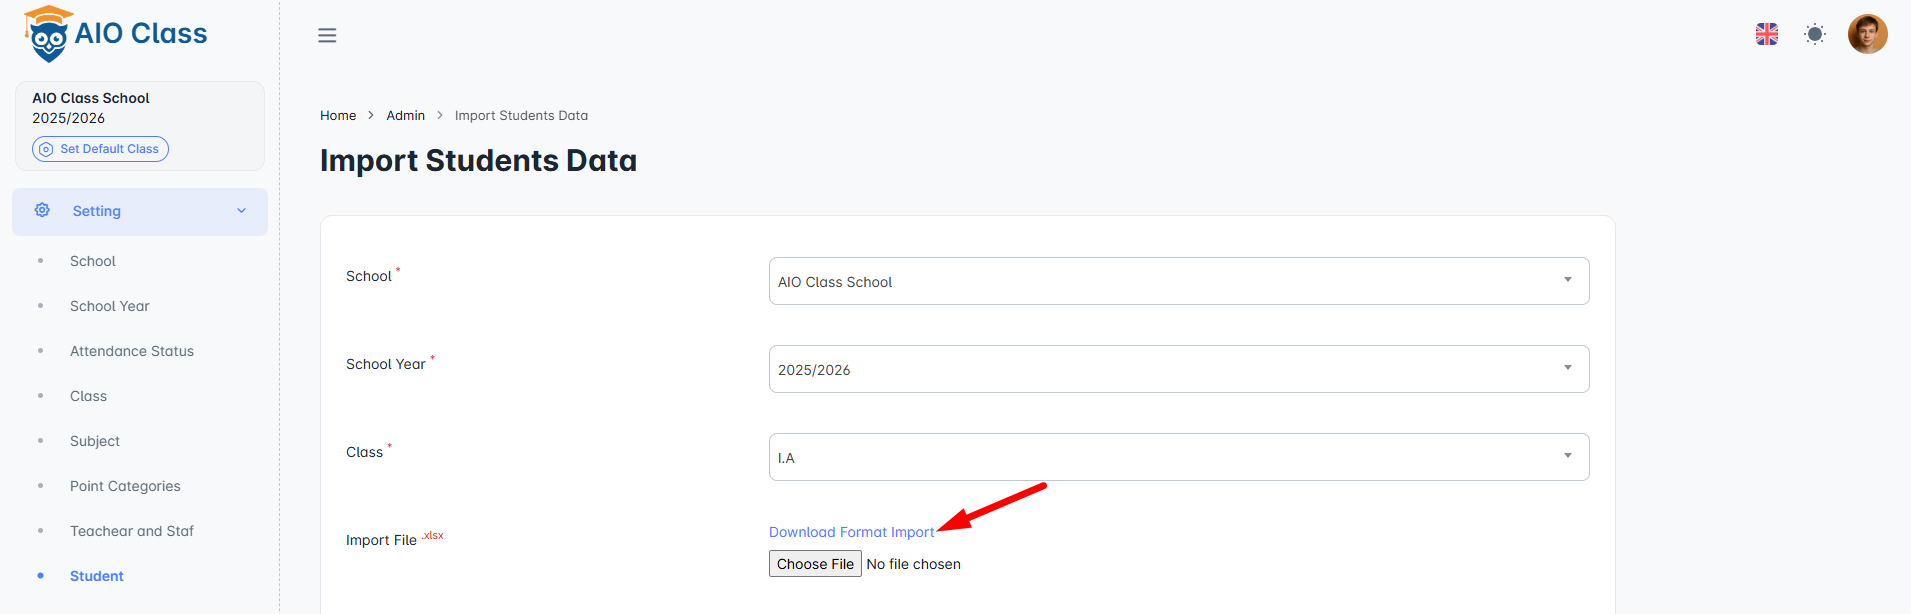
- In School, select your school name
- In School Year, select the academic year
- In Class, choose the class you want to add student data to
- Click Download Format Import to download the Excel template. Once downloaded, open the file.
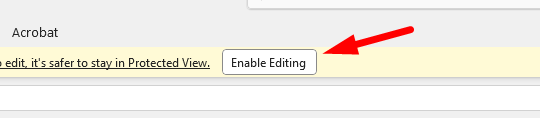
- Click the Enable Editing button (if it appears).
- Fill in the student data as shown in the example:
- In ID, type the student’s ID
- In Name, type the full name of the student
- In Gender, type the gender: Male or Female
- Add all student names.
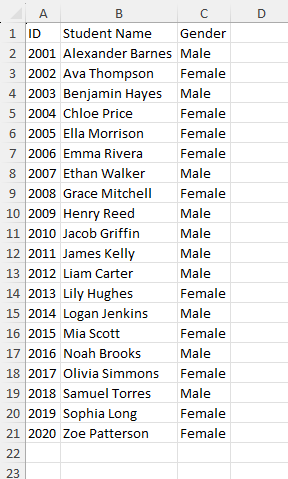
- Once completed, save the file.
- Return to the web page, click Choose File and select the completed Excel file
- Then click Import
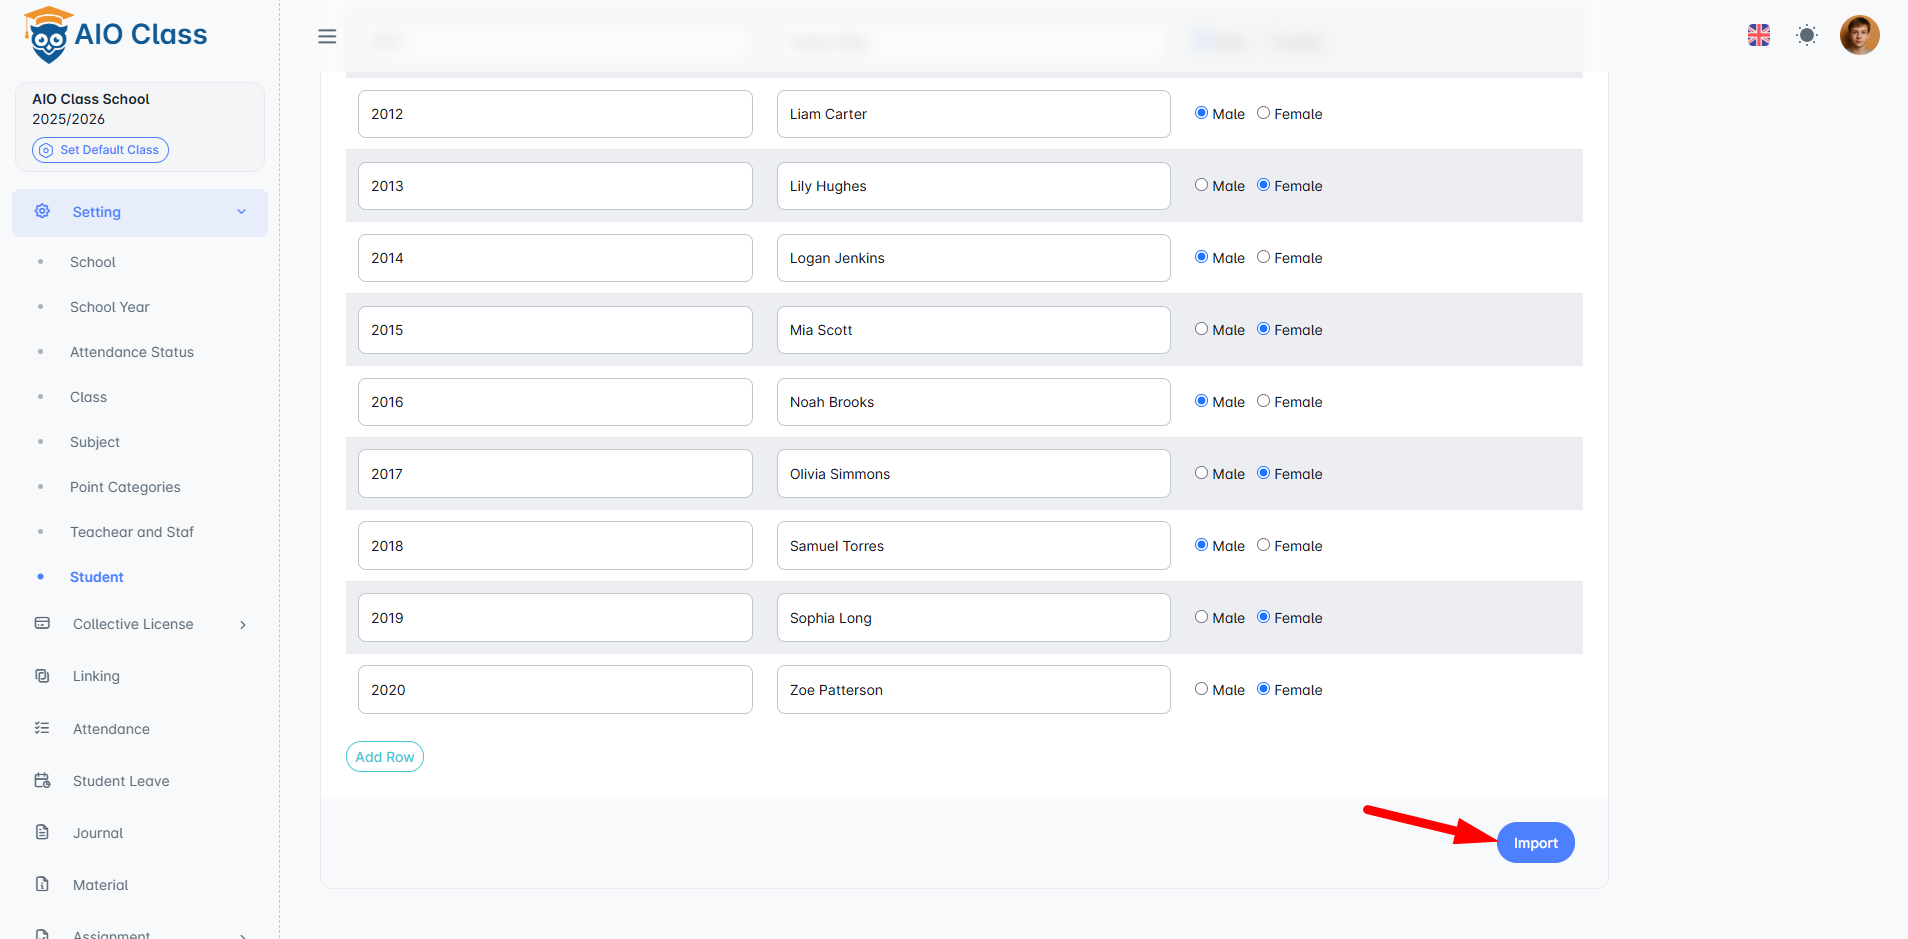
- The application will display all student data from the Excel file. Check again to ensure it's correct and fix any errors.
- If everything is correct, click Import
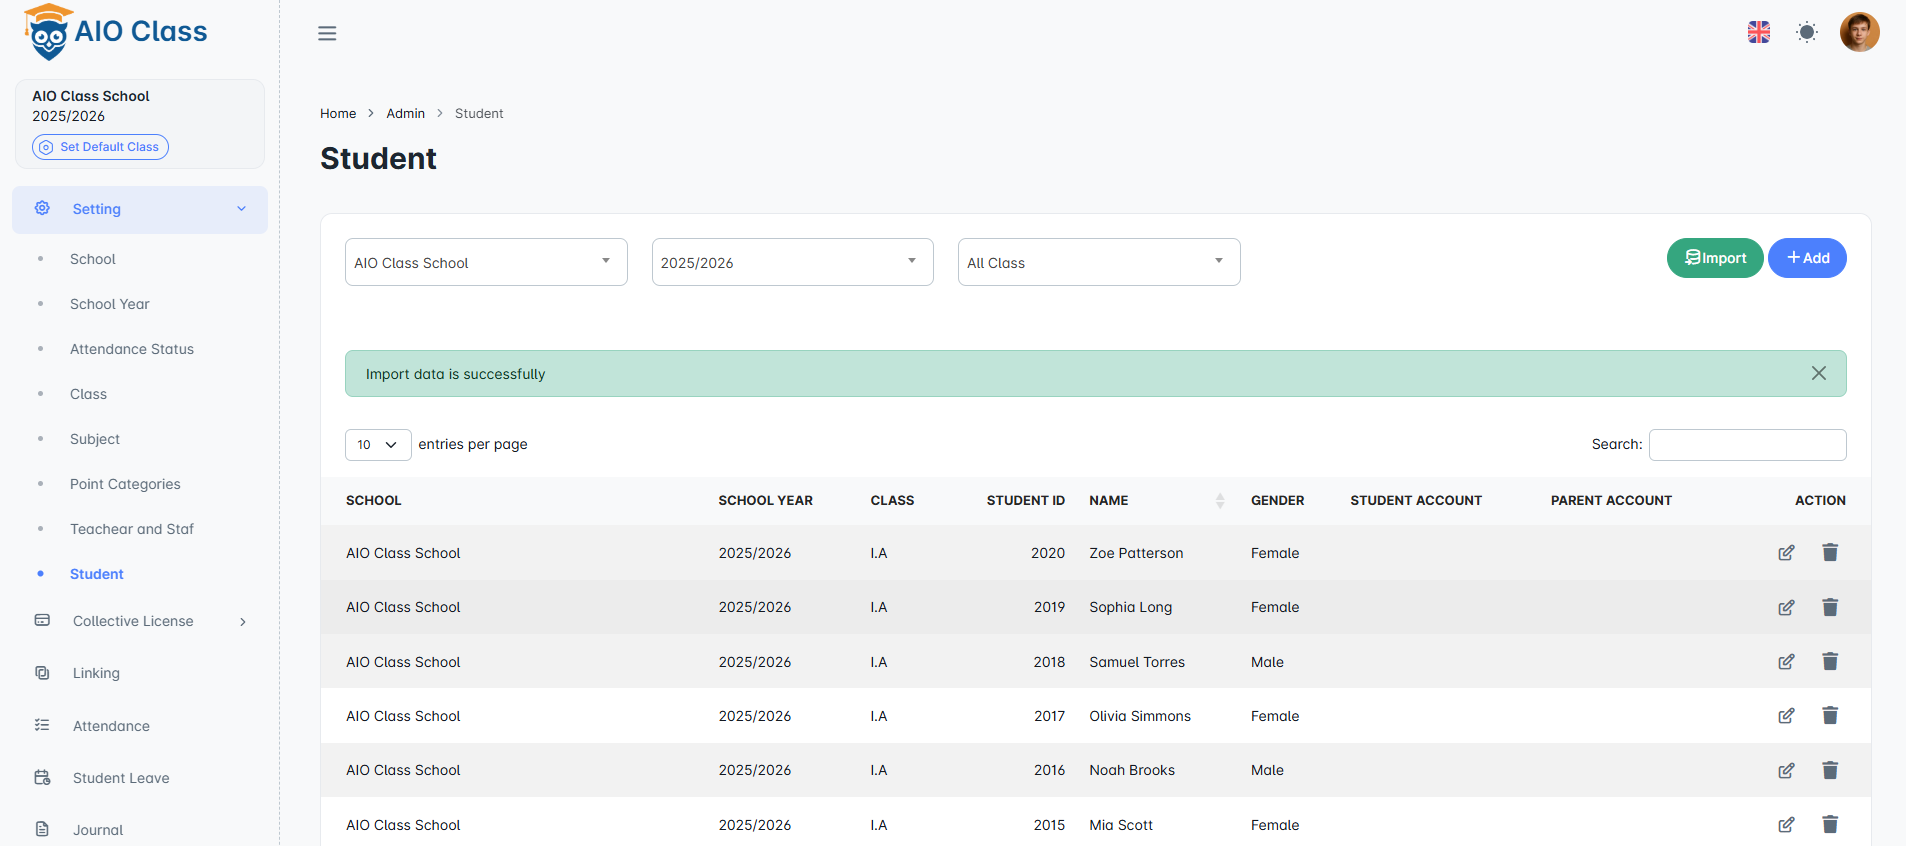
- You will then see the student data that has been successfully imported.
- Done